Showing posts with label cook from scratch. Show all posts

Thursday, 30 July 2015

Stuffed Pork Tenderloin wrapped in ham


This is a dish that has been in the family for years... so long, in fact, that it's not even in my ancient, handwritten recipes book!

The ingredients we used were 6 slices parma ham (could also use serrano or proscuitto), about 85g blue cheese (we used gorgonzola), 2 Tablespoons of sundried tomatoes (ours had been preserved in oil), a generous handful of spinach (ours were fresh baby leaf, but frozen is also fine - use about three blocks) and a loin of pork in a piece (ours was about 450g).

The pork loin was prepared by carefully removing the sinew from the outside (we used a sharp knife for this - makes it easier to slice close to the tough bits that need removing).  Then the loin was cut along its length but NOT all the way through.

It was then opened out and, with a piece of baking paper on top, was bashed with a rolling pin (or you could use a meat tenderiser) to an even thickness of about 1cm.


Whilst the pork was being prepared, the tomatoes and spinach were heated through in a pan on a medium heat.


As soon as the spinach had wilted, the blue cheese was added and mixed through.

The spinach, cheese, tomato mix was then placed along the length of the loin and the edges were gently pulled together (this can be a bit fiddly and you may have to adjust the amount of filling needed depending on how thinly the pork has been beaten out).

Carefully wrapping the filled loin with ham, the edges were covered and then the meat was wrapped, as tightly as possible in greaseproof paper.

Placing the meat in the fridge, it was left to cool for an hour (longer is fine, can be prepared to this stage the day before).

To cook, the meat was placed in a roasting tin and put in a pre-heated 170ºC fan oven.

We cooked ours for 35minutes as it was very well chilled before going into the oven.  The meat was checked for level of cook by inserting a metal skewer, making sure it was warm at the tip, and seeing if the meat juices ran clear.  If it's not done enough, return to oven and set timer for another 3-5 minutes until cooked to your liking.

The meat was then rested on a carving board for ten minutes.

Carving the meat, it was served with vegetables and roasted mixed potatoes.

When cooled completely, it carves well and we often use it as a cold picnic meat.

Sunday, 14 June 2015

Simple Bolognaise Sauce


Sous Chef J is keen on foods that "don't take much eating"... by which he means he doesn't have to wield a knife and fork to cut up.  So dishes using mince, slow cooking and pasta are always requested.  This is our take on a pasta sauce - served with spaghetti or other pasta and oodles of cheese. 

Ingredients we used were -

400g mince beef
400g tin chopped tomatoes
2-3 white onions, chopped
2-3 carrots, chopped finely
200ml rich beef stock (we used a Knorr stock pot)
1 Tablespoon tomato puree
oil (we used the remainder of the oil from a jar of preserved red peppers - thrifty as ever!)
freshly ground black pepper
grated cheese, to serve (we used mature cheddar today but parmesan or other works well too)

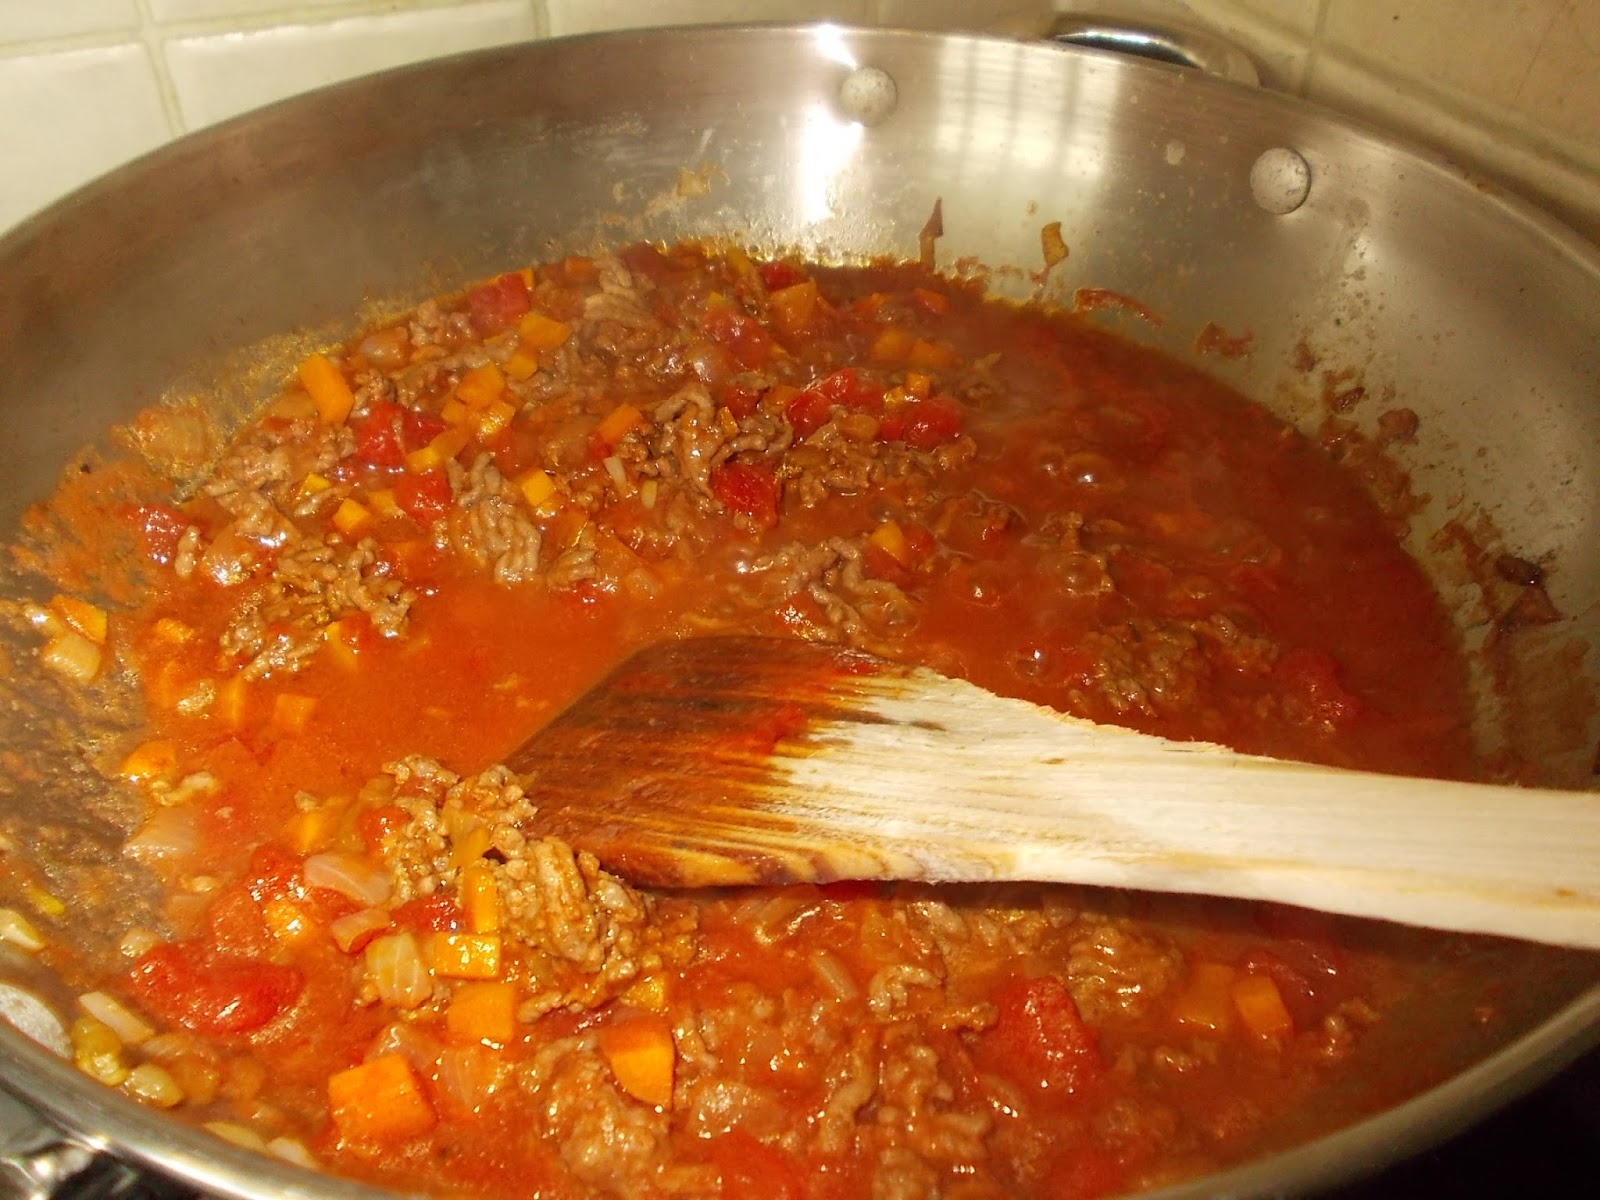
Having chopped the onions, they were cooked in some oil in our wok on a medium heat until they started to turn translucent.  Then the beef was added and cooked for a few minutes until it began to brown.  Next the tomato puree was added, stirred through and the wok lid was placed on and left to cook for about 10 minutes on a low heat.

At this point the carrots, which we'd chopped whilst cooking the mince mix, chopped tomatoes and stock were added to the wok.  The heat was turned up slightly and the sauce was left to cook down for about 25-30 minutes.... the lid left slightly ajar to allow some reduction (boiling off) of the sauce to happen. 

The sauce is served with pasta (today we used Salute spaghetti) and a salad.... and gone in a flash.  The spaghetti was cooked, drained and returned to a buttery pan, then the sauce was mixed through before serving.


We reserved half of the prepared amount, allowed it to cool, bagged and labelled it and froze to use later when time/inclination is lacking and a speedy supper is required.
This could be cooked in a slow cooker but it's supposed to be summer so we did it on the hob!

Sunday, 5 April 2015

Pineapple Ketchup & Sweet Potato Wedges

We spotted a recipe for Pineapple Ketchup (to go with sweet potato wedges) in the Waitrose Spring 2015 leaflet (the same one this Lemon & Pistachio Cake was in) and thought it would be a nice idea to give it a try.  Of course, we decided not to make the amount the recipe is for but, as it was a trial, we'd make half.

For the amount of ketchup we wanted to make, we needed -

1 tbsp olive oil
2 shallots, finely sliced (we used frozen, chopped shallots - about 4 Tablespoons)
3cm piece fresh root ginger, peeled and grated
1/4 tsp ground cloves
1/4 tsp ground cinnamon
3 all spice berries
2 cloves garlic, peeled and halved
1 small pineapple, peeled, core removed, flesh chopped
100ml cider vinegar
100ml pineapple juice
Lime juice (we used 45ml ready squeezed juice)
100g brown sugar
1 tbsp sundried tomato paste

Putting the olive oil in a saucepan, we heated it through and added the chopped, frozen shallots.  These were then cooked on a low heat for a couple of minutes (to de-frost them) then the heat was increased and they were cooked until they started to soften (about 5 minutes).

Adding the ginger, spices and garlic to the shallots, they were cooked for another 5 minutes.

Stirring in the pineapple, vinegar, juices, sugar and tomato paste, the heat was increased until the ingredients started to simmer.  We then reduced the heat and cooked for another 25-30 minutes when there was less moisture and the pineapple was starting to break down.

We turned off the heat and waited for about half an hour for the mix to cool when we used a stick blender to purée the ketchup.  Up to this point we felt it was pretty much like making a chutney.

The next step was to pour the ketchup into a sieve (placed over a bowl), using a spoon to push it through.

Finally the ketchup was 'bottled' in sterilised jam jars.  Not a huge amount but enough for a first try.

The Waitrose recipe says the ketchup can be kept for 3 months but, having tasted it, we don't think ours will last this long!

On another day, we got round to making the sweet potato wedges.  It was simple and the pictures below show this... 
Gather sweet potatoes and scrub them


Cut into wedges, toss in 2 tablespoons of olive oil, mix through 1 teaspoon of sweet smoked paprika (we used a little more than this)

Spread in a single layer onto a baking sheet (ours was preheated) and bake at 200C for 25-30 mins (depends on wedge size). 


Remove from oven


Sprinkle with chopped, fresh rosemary


The cooked wedges were then served with the previously made pineapple ketchup.  The dish was declared "lovely" by Sous Chef J.  The next batch of wedges and ketchup we make will both be larger!

Friday, 24 October 2014

Scary Skeletons

Using a basic biscuit mix, we made some 'men' bix and decorated them with runny icing... trying to see which was the best representation of a skeleton.

The ingredients we used were -
  • 200g unsalted butter, softened
  • 200g caster sugar
  • 1 medium egg, beaten
  • 400g Dove's Farm Gluten Free plain flour  
The butter and sugar were creamed together using an electric hand mixer.  Once they were soft and fluffy looking, the egg and flour were added.  This was mixed well, first with the mixer, and then using a silicone spatula until a dough was formed.  (At this point, you can roll the dough into a sausage shape, wrap in cling film or greaseproof paper, put in a plastic bag and freeze for later use.)  We rolled out the dough, to about 4-5mm thickness, on a silicone sheet and used a gingerbread man cutter to shape them.  They were cooked on a greased, non-stick baking sheet for 8-10 minutes in a pre-heated 170ºC oven.  Once lightly browned, they were cooled for 5 minutes on the sheet before being transferred to a wire rack to cool completely before decorating.

Once cooled, they were decorated using ready made icing... in various 'scary' skeleton-like designs.

Some were placed in airtight containers for later consumption... but were keen to attempt an escape! 

Saturday, 23 August 2014

Tuna and Courgette "Lasagne"

This recipe has been a favourite of Sous Chef J's since being a young toddler.  I think it was originally from a cooking for your baby/child recipe book a pal gave me.  The original recipe used standard wheat based lasagne sheets but, since following a gluten free diet, we have used gluten free pasta and, this time, used a vegetable substitute.  We were lucky enough to be offered a HUGE courgette (zucchini) by someone at B's office and decided it would be perfect for making a lasagne with.

Listed ingredients for the dish are -

1 Tablespoon oil
1 onion, finely chopped
1 garlic clove, peeled and crushed
2 courgettes, trimmed and sliced
125g sweetcorn kernels
1 tin (400g) chopped tomatoes
250ml water
2 Tablespoons tomato puree
300g tinned tuna (drained and flaked)
cheese sauce - cornflour, butter, milk and cheese (see below)
6 sheets lasagne (we used courgette!)
grated cheese
seasonings

First of all the courgette was trimmed to size to fit the lasagne dish.  the main 'body' was then lightly peeled and carefully sliced to provide 6 'lasagne' sheets.

We tested them for size by putting them in the dish.


Adding the oil to a frying pan, we added the chopped onion and garlic and lightly sauteed it until it became soft.


The remainder of the courgette was chopped into chunks and added to the fried onion together with the sweetcorn.  This was allowed to cook, over a moderate heat, for a few minutes.


Next, the tinned tomatoes, water and tomato puree were added to the pan.  This was brought to the boil then simmered for about 30 minutes.


Whilst the sauce was cooking, we got on with making the cheese sauce.  This is a really simple recipe using -

30g butter
30g cornflour
300ml milk
75g grated cheese (we used cheddar)

The butter was melted in a small pan.  The cornflour was then added and mixed well to make a paste before being stirred over a low heat for about a minute.


Next the milk was gradually added, whilst whisking the mix gently.  Once all the milk had been addded,  the sauce was brought to the boil until it became thick and smooth (make sure you whisk/stir well throughout).


Finally, with the pan removed from the heat, the grated cheese was added and incorporated using the whisk.


Once the tomato sauce had thoroughly cooked, it was taken off the heat and allowed to cool slightly before adding the drained tuna. 

Then began the task of assembling the 'lasagne'... the first third of the tuna mix was put in the base of the dish before being covered with two slices of the courgette. 


A third of the cheese sauce was put on top of the courgettes and the next third of the tuna mix was placed on top.

The layering was repeated again until the final two slices of courgette had been covered with cheese sauce.


We then seasoned the top with freshly ground black pepper and sprinkled over the grated cheese before adding the dish to a pre-heated oven at 180ºC for about 45-55 minutes. We like to wait until the top of the dish is bubbling and the cheese is just beginning to brown in places.  (The cooking time will vary depending on the shape/size of dish used so keep an eye on it!)

Once cooked, the tuna lasagne was served with some peas.  The quantities in this recipe easily feed 4 but you can serve smaller portions and accompany it with green salad if you need to feed 6.