Monday 30 November 2015

Gingerbread Star Trees


Having spotted this recipe in the Waitrose Christmas Harvest cook book, we decided to try the recipe for gingerbread, tweaking it to be gluten free.

The ingredients we used were -
125g unsalted butter
100g dark soft sugar
4 tbsp golden syrup
325g Dove's Farm gluten free plain flour, plus extra for dusting
1 tsp bicarbonate of soda
1 tsp ground ginger
1 tsp Waitrose Signature Spice (ground) (this is a blend of spices - cinnamon, ginger, etc)
To decorate
100g icing sugar, sifted, plus extra for dusting
20ml egg white

We also used a set of 5 star-shaped cookie cutters, plus a 1.5cm round cutter, non-stick baking sheets and a silicone sheet for rolling out the dough on.

Preheating the oven to 170°C, we put the non-stick baking trays in the fridge to cool.

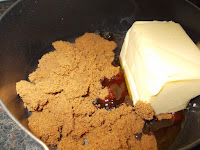
First of all we melted the butter, sugar and syrup together in a small saucepan, stirring occasionally, then removed from the heat and combined well with a silicone spoon.


Having sifted the gluten free flour, bicarbonate of soda and spices into a bowl the melted ingredients were stirred

in to make a stiff dough.

Turning the dough out onto a silicone sheet, it was cut in half.  Half the dough was put to one side to be frozen for later use.  The remaining half was rolled to a thickness of about 5mm.

Using the cutters, we cut out one of each size star and 4 of the rounds. After cutting the stars, we also cut out additional small stars, gingerbread men and holly leaves for icing later.
The cut biscuits were then placed on the chilled baking sheets before chilling for 10 minutes until firm.

Baking the biscuits for 10-12 minutes, we checked they were just turning a light golden brown, before cooling on the tray for a couple of minutes.  Next they were transferred to a wire rack and left to cool.

When we were ready to ice the biscuits, we mixed together the icing sugar and egg white until smooth then spooned into a small greaseproof piping
bag.

Assembling the tree, we used the icing to stick one of the round biscuits onto the centre of one of the largest stars. We then added the next star biscuit on top and continued to build layers using one small round and the next size of star, descending in size, to form each layer.

We used two of the smallest star biscuits, sandwiched with icing, on a cut cocktail stick to form the tree's top.

Dusting with icing sugar, the gingerbread tree was placed inside a plastic pot (reusing a meringue pot from Sainsbury's in-store bakery) ready to be eaten later.


We decorated the remaining biscuits with first white, then coloured icing.  Turning the gingerbread man shape upside down and icing it as a reindeer (a jelly bean was used as the nose!)  We made small snowflakes out of the stars and turned the holly leaves and rounds into a holly spray..... these were stored in a seasonal tin to be eaten later.

Thursday 19 November 2015

Parmesan Polenta Chicken Mini Fillets

This recipe was developed as a response to the thought 'what can we eat tonight?'  The oven was going to be in use to bake some shortbread for J and we were out of the 'usual' items we'd use to coat chicken (ready salted crisps, crushed)   With a small remnant of parmesan and a bagful of polenta to hand, a plan (recipe) presented itself.  It's really simple and turned out well too.

Doing a fridge audit and seeing we had a pack of chicken mini fillets and needing something that could be baked in the oven, we decided coating the chicken would be a good idea.  

We grated some parmesan (about 40g) and added it to a handful (80g) polenta and seasoned with freshly ground black pepper.  Placing the coating in a bowl, an egg was beaten in another bowl and these were then used, in turn, to coat the chicken mini fillets.

Dipping the chicken in the beaten egg


it was then added to the parmesan/polenta mix and coated.

Once coated, the chicken was placed on a non-stick baking sheet before being baked in a 170ÂșC oven for 20-25 minutes until completely cooked through - adjust cooking time depending on the thickness of the pieces used.

When cooked, the parmesan/polenta coating was starting to brown.  The chicken was removed from the oven and served with chilli potatoes, stir fried kale and sweetcorn...


This coating and technique could also be used with chicken pieces to make nuggets or, if you flattened some larger chicken pieces, it would also be a good way to make escalopes.  Adding a dash of chilli powder to the parmesan/polenta will result in a spicier coating too.

Friday 30 October 2015

Alvin's Savoury Quick Bread


Having seen quick bread being made on this year's Great British Bake Off, and liking the sound of the prosciutto, manchego and balsamic onion loaf Alvin made, we decided to give it a go.  Requiring only plain flour we hoped it would be ok to substitute Dove's Farm Plain Flour in Alvin's recipe.  It was a surprisingly "decent attempt"... here's what we did with the ingredients (we omitted the basil) which were -

2 tbsp olive oil
1 large red onion, finely sliced
3 tbsp balsamic vinegar
1½ tbsp soft brown sugar
450g  Dove's Farm Gluten Free plain flour
1 tsp bicarbonate of soda
1 tsp salt
30g cold unsalted butter, diced
80g prosciutto, torn into strips
200g Manchego cheese, diced
300ml buttermilk + water
1 tbsp butter, melted (for topping)


We warmed the oil in a small frying pan and, once hot, added the red onions. The heat was then reduced and the pan was covered with a lid.  After about 15 minutes we added the balsamic vinegar and soft brown sugar, this was then cooked, without the lid, for 5 more minutes to caramelise lightly.  It was then removed from the heat and left to cool.

At this point, we set the fan oven to 180C and lined the baking tray with baking parchment.

Having sifted the flour, bicarb and salt into a bowl, we rubbed in the butter by hand till a
fine breadcrumb consistency was reached.

Putting to one side a tablespoon of the onions, a small amount of the chopped cheese and some of prosciutto - this would be used for the loaf's topping.

We added the remaining onions, ham and cheese to the flour mixture and made sure it was well combined

Adding a small amount (about 25ml) water to the pot of buttermilk, we carefully mixed it in to loosen the buttermilk slightly.

Having made a well in the flour mixture we added about two thirds of the thinned buttermilk. Using a lightly floured hand, it was all mixed until it began to bind together... we did have to add more buttermilk and, probably, should have added more to get a wetter dough.

Next we turned the dough out onto a lightly floured silicone sheet and shaped it into an oval.  It was  about 4cm thick.  Having moved the loaf to the baking sheet, we dusted it with a little flour and the top was scored, diagonally, with a knife.

Finally, the remaining caramelised onions, ham and cheese were
placed on top.

The loaf was baked for 35 minutes when we covered the top with foil to stop it burning.  It was cooked for a further 10 minutes when the loaf was removed and transferred to a cooling rack. 

We brushed the top of the loaf with melted butter and allowed it to cool fully before being sliced thickly.  It made a lovely addition to lunch... and was a delicious breakfast too!

Wrapping the loaf in foil, it kepy well in the fridge for a couple of days. 

We'll definitely make this again, although will likely make a half size batch loaf and will also make sure we add enough buttermilk to get a slightly wetter dough which should allow easier working and shaping.

Sunday 25 October 2015

Pineapple upside down cake

Sous Chef J has been wanting to try making a Pineapple Upside Down Cake for ages.  Last week I bought a couple of fresh pineapples (one medium and the other HUGE sized).  So, when they had ripened and we were looking for inspiration on a chilly afternoon, he suggested the cake.  We searched for a suitable recipe to follow and came up with this slightly tweaked amalgam recipe -

For the topping -
50g softened butter
50g soft brown sugar
1 medium pineapple, peeled, cored and sliced (we reserved the juice from this undertaking for later use) - if you don't have fresh, then tinned pineapple rings in juice will be fine.
For the cake -
100g softened butter
100g golden caster sugar
100g self-raising flour (we used Dove's Farm gluten free SR Flour)
1 tsp baking powder (we used Dr Oetker gluten free)
1 tsp vanilla extract
2 large eggs
We set the oven to 160C fan and prepared the topping.  To do this, we beat the butter and sugar together until creamy. The topping mix was then spread over the base and a quarter of the way up the sides of a 21cm round spring-form cake tin. 


The pineapple was prepared using an Oxo Good Grips pineapple
device... it was a two person job but we were pleased it worked well.  Next, Sous Chef J arranged 4 pineapple rings on top of the butter/sugar mix. 


Placing the butter and sugar in a bowl, we used an electric hand mixer to cream them together.  The eggs were add, one at a time, before including the flour and baking powder.  The mix came together nicely and looked creamy and light in colour.  We then mixed through about 2 Tablespoons of the reserved pineapple juice and made sure it was fully combined to a soft consistency. 


The cake mix was put into the tin on top of the pineapple and smoothed. 
We baked the cake, having placed the tin on a baking sheet (as the springform tin leaked - use a tin without a loose bottom if you have one!  We learnt from this for subsequent bakes) for 35 mins. 
Having left the cake to cool for 10 minutes, it was turned out onto a platter.

Sous Chef J has developed a liking for helping with "cook's reward" activities and is keen to assist with "checking the mix tastes OK".


We have also repeated this recipe making a square traybake cake (pics show both baking sessions) and Sous Chef J's "Singular Pineapple Upside Down Tarts" ....they were fab and are the header pic.


Monday 5 October 2015

Free From Gluten in North Norfolk

Followers of this blog will be aware we visit North Norfolk a few times a year.  This is not just because of its easy accessibility to us by car or the scenery which we love but also due to the ready availability of tasty gluten free food when eating out.


We've blogged about the Art Cafe at Glandford before but it really is an absolute favourite of ours and, with the discovery this year of their "awesome frangipane" cake, but the apricot slice was also a massive hit in July.  We have even made a day trip from the Midlands there for Sunday morning coffee and cake.  The coffees and drinks on offer are also worth travelling for - the latte is always spot on the right temperature for drinking and the perfect milk to coffee ratio for me.  J loves their 'dark hot chocolate'.
A new this year find is Eric's Fish and Chips at Drove Orchards, Thornham.  They are open 12-9pm every day and always have gluten free battered fish and chips on sale.  Also, we've tried the pineapple fritter which was crisp and juicy.  Taking Peppie dog with us means we haven't 'eaten in' at Eric's but we have made use of their picnic benches, handily outside, and also driven to nearby Hunstanton beach with take away.

Also found, much to B's delight, was a range of gluten free local Norfolk ales.  They are produced at the Poppyland Brewery, a micro brewery based in Cromer. B bought a selection and enjoyed them all. 

We also like visiting the National Trust's Felbrigg Hall as their cafe is dog friendly and they sell gluten free cakes from Baked to Taste - always a welcome find on our travels.

Leaving you with a pic of J about to 'dig in' to his haddock and chips... lovely, crisp gluten free batter.  We aim to travel back for more F&C as a treat sometime over the next few months... we may even try out eating indoors!
 

Through a twitter conversation, have been reminded we forgot to add that at the Art Cafe site, Manor Farm Barns Glandford, there is a huge changing places accessible disabled toilet.   Well maintained and clean, it's a surprising find but one that many may find useful to know about.
 

Sunday 27 September 2015

Simple, surprising, Chocolate Mousse

Having spotted a recipe of Lorraine Pascale's that looked interesting, we decided to give it a go.

As is usual for us, we didn't have *quite* the right ingredients so made a couple of minor tweaks.  However the recipe remains gluten free, dairy free, added sugar free and egg free.  Plus, it's a one pot 'whiz up' mix which is an added bonus!

The ingredients we used were -

One ripe banana, peeled
One ripe avocado, peeled and stone removed
62g dates, with stones removed
42g unsweetened cocoa powder

(this made enough for three quite large servings)

The banana and dates were put in a food processor, they were whizzed to combine and then the avocado was also added.

Finally, the cocoa powder was added and mixed until all ingredients thoroughly combined.

Splitting the mousse between three serving dishes, they were then cooled until it was time to eat them.  Having a smooth texture, they were very chocolatey and not too rich.  A lovely end to our meal.  Really simple to make and not as bad for you as other chocolate puddings!

Sous Chef J has suggested adding coffee to them the next time we make them - the finely ground instant coffee beans type - and we think the addition of a teaspoon of this will create a lovely rich mocha dessert.

Saturday 8 August 2015

Baking Coconut Biscuits


It was the return of Great British Bake Off on TV in the UK this week.  We'd seen on twitter that @HBFreeFrom were running a competition called Big Free From Bake Challenge - each week a different free from bake will be given.  We entered and were selected for week one which was gluten free baking... and our bake was BISCUITS.

Here's what we said as part of our entry -


We decided to bake a recipe that we make regularly, that is really simple and uses a small amount of ingredients whilst still making tasty biscuits.

Our recipe is printed on yellow paper (for easy reading) and laminated so Sous Chef J can use a white board pen to tick off the steps as they’re completed.

It’s a good beginner’s recipe and, as its steps are detailed clearly, is something that anyone can bake… you most definitely do not have to be a Master Baker to make this!

Here's  a link to the video we submitted... now uploaded to youtube


and this is the recipe
Take a look at the video... we hope you like it.  It really is how we bake... we shot exactly what we do and then had fun with our first ever foray into mp4 files and editing.... quite a lot of editing to get it down to 2 minutes (ish!)