Showing posts with label Baking. Show all posts

Sunday, 1 March 2020

Cheese & Onion Loaf


We saw on twitter that the Box Bakery were selling #GlutenFree mixed packs containing bread and chocolate cake. Always on the look out for simple bakes, particularly bread, we placed an order. It was speedily delivered and the contents seemed tempting... and more importantly, required just warm water to be added!


Looking at the bread options, we decided to try the white bread mix. We thought that it would be nice tweaked with the addition of cheese and onion. 

To make the onion, a medium red onion was sliced thinly and fried in oil until it was starting to look transparent. It was then taken off the heat and left to cool. The cheese (we used Red Fox vintage red leicester) was grated.  
The instructions on the Box Bakery packaging were then followed. 

Opening the box on the corner, the lukewarm water was added. Having shaken the box as instructed, the lid was carefully peeled off and a fork was used to ensure the mix was fully combined.

At this point the onion and cheese was stirred into the dough and mixed through. The top of the loaf was brushed with olive oil. 

Following the instructions, the loaf was placed, in its box, in a cold oven with the temperature set for 50C, then cooking for 25minutes (a little longer than stated in the instructions to allow for the additional ingredients included in the loaf)

The oven temperature was then increased to 210C (fan) and the loaf was baked for 50 minutes.  It was checked after this time and the oven was turned off, leaving the loaf in the hot oven for a further 10 minutes. 

Taking the loaf out of the oven, it was left to cool.

Finally, it was removed from the box and sliced... 

We thoroughly enjoyed the bread and it was very good toasted as well. The concept of Bake in the Box is very good for easy, cupboard options...and also for those who aren’t #GlutenFree but want to offer pals who are a home baked and SAFE bread! I will be making sure my mum has a box for our next trip to see her 😉

Wednesday, 13 December 2017

Slow Cooked Choc Chip Scone

We have been trying to manage all our cooking requirements using just a single gas burner and the slow cooker recently.  Many chats around 'surely it must be possible to bake in the slow cooker' were entered into and some research on the internet (mostly US sites where they use crock pots) showed that many people do use slow cookers for baking. 

Using a simple, one bowl recipe for scone mix, we assembled

225g gluten free self raising flour (we used Dove's Farm)
30g caster sugar
55g unsalted butter, broken up
100ml natural yogurt and 50ml water
40g chocolate chips

Having measured the flour, sugar and butter into a bowl it was rubbed together until it resembled breadcrumbs.

Then the yogurt/water was added and mixed until a dough was formed.

The chocolate chips were added and worked into the dough.

The dough was shaped to fit our slow cooker bowl (we have an oval, 3.5l cooker) and had lined it with a parchment cake liner.

Adding the shaped dough to the slow cooker, it was set to high and a tea towel was placed over the bowl before the lid was replaced 
(this was to absorb any condensation from cooking)

After about an hour and a half, the scone was checked to see if it was cooked... we decided to take the lid off at this point and switch off the cooker, leaving the scone inside for a further 15 minutes. 

The scone was then removed (carefully, it's hot!) and allowed to cool before being sliced and eaten with cream.
Definitely a successful bake added to our repertoire.. and it's best eaten on the day it's made.

Saturday, 9 December 2017

Chocolate Brownie Christmas Pudding Kit

We were pleased to see a range of different ideas in the Christmas section at Tesco... this #glutenfree Chocolate Brownie Christmas Pudding Kit caught our eye (particularly as it was on offer at £2.50!)
Checking out what was needed to use the kit, it was good to see that it wasn't a huge list of non-standard things.  So, we picked out the pyrex bowl, found the greaseproof paper and weighed out the butter (uses 100g, melted or use dairy free spread) ... before adding it to a large, beaten egg and 20ml water.

These were mixed lightly (we used a fork) and then added to the 'dry' ingredients and thoroughly mixed.

Having greased and lined the 0.5l pyrex pudding bowl, we added the mix and levelled the top.


The brownie pudding was then microwaved... the instructions mention 800W strength but the microwave we were using was only 700W so we lengthened the cooking time.

Once done, the pudding looked (and smelt) pretty good!
Whilst the pudding was being cooked, we made up the icing by adding 2 tsp (10ml) water to the icing sugar and mixed it well (we used a mug for this).

The pudding was allowed to cool in the bowl for about 20 minutes before it was turned out onto a plate and the greaseproof paper was removed (easily).

Next, we poured the icing over the top...

 .... and then added the holly sprinkles (a generous portion!) before we dived in to try.

It was a huge success and definitely something we all enjoyed (though our portions served 6 from the kit, not the 8 the packaging mentions)


Sunday, 26 March 2017

Welsh Cakes

My Granny was Welsh, she made great Welsh Cakes... and I remember making them with her.   However, Welsh Cakes are usually made on a griddle, a flat iron plate, which I don't have.  Having a new 'ceramic non-stick' frying pan, we needed a recipe to try out its non-stick properties and Welsh Cakes fitted the bill nicely.

I don't have my Granny's recipe but I do think the one I made up is pretty close... apart from using gluten free flour (which I don't think existed back in Granny's day!)

The ingredients we used were:-

225g self raising flour  (we used Dove's Farm gluten free)
pinch of salt
1 teaspoon mixed spice
110g butter (Granny used to use lard)
75g caster sugar
75g mixed currants
1 large egg beaten


Using a bowl, we mixed the flour, salt, spice and butter.  We used a hand balloon whisk to get a breadcrumb-like texture (and this also 'saves' my ailing fiingers from too much effort)

Next the sugar and currants were added and mixed through.


Finally the beaten egg was added.  At this point, the mix it may be a bit dry still, so if needed, use a little buttermilk or yogurt, to make the dough soft enough to be able to brought together (we did add yogurt to ours).

Once the dough came together and wasn't too wet or dry.  We lightly pressed it out, then rolled to about 5-7mm thick.  The dough was then cut in 5cm rounds.

Heating the pan, the cakes were cooked - you can use a heated griddle, lightly buttered frying pan, or as we did in a ceramic coated frying pan (it worked very well.

Cooking till browned on one side, the cakes were flipped/turned and cooked on the other side (about 3 mins a side... but depends on heat, thickness and the level of 'cook' you're aiming for).

Once cooked on both sides, the cakes were removed, placed on a plate and drizzled lightly with caster sugar.

Eaten warm, they were delicious.  They were also very tasty with a cup of tea and, surprisingly, kept well in an airtight container.

Sunday, 5 February 2017

Choc Nut Babka Loaf

We made a batch of enriched dough (same as for Pain ua Choc Fingers and Cinnamon Buns) using the following ingredients -

175g bread flour (we used Dove's farm gluten free which includes xantham gum - of yours doesn't you'll need ¼tsp xantham gum)
2¼tsp fast action dried yeast
50g caster sugar
2tsp baking powder (we used Dr Oetker gluten free)
50ml olive oil
50ml warm water (you may need more)
1 medium egg
1tsp vanilla extract

Putting the liquid into a bowl, we used a hand mixer with dough hooks to incorporate all the dry ingredients a spoonful at a time... and then mixed for about 4-5mins till binding well.

The dough was placed in an oiled bowl, covered with oiled cling film and put in the airing cupboard to prove for about an hour.
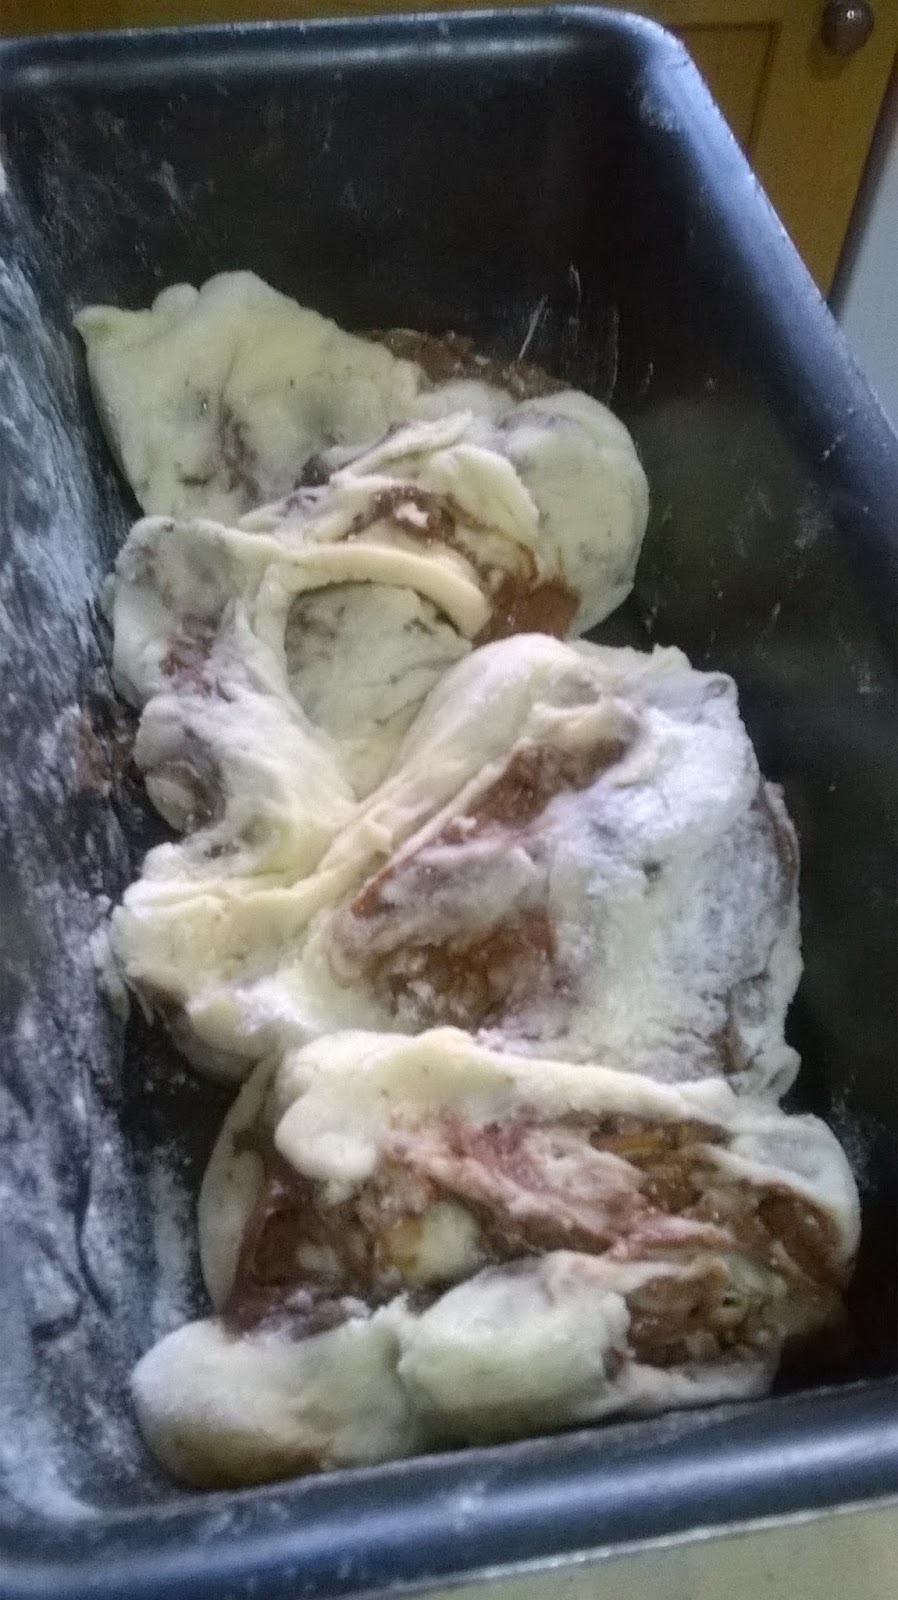
Once proved, the dough was rolled out to a large rectangle (roughly 35cmx25cm) and covered with  the warmed choc nut spread using a silicone spatula (we used about two Tablespoons of spread, which had been warmed in a small pan so it was more pliable).  Next a handful of chopped nuts (macadamia, pecans, hazelnuts all work) were sprinkled over. 

The dough was rolled from the LONG side to form a cylinder. 


This was then cut down its length leaving one end in tact.  The pieces were then twisted over one another (doesn't matter if this is messy... it likely will be!)  and the 'plait' was placed in a non-stick loaf tin.

Putting the dough, in its tin, to prove for another 45mins to an hour (again having covered the dough with oiled cling film)


The oven was heated to 170C (fan) and then the loaf was baked (having removed the clingfilm) for about 25 minutes, checked and then returned to bake until golden brown (you'll have to adjust this based on your oven and tin size... a more compact cake will require a longer bake).

It was left to cool in the tin and turned out when completely cooled.

Friday, 16 December 2016

Cheese and Chilli Whorls

Today was a 'make it' day... with not much time.  The oven was on and we needed some savoury snacks for the weekend.

A fridge audit revealed some Silly Yak pastry and grated mature cheddar... and an idea was forming.

Using half a pack of Silly Yak gluten free puff pastry, it was rolled out into a rectangle (about 3mm thick). 

The cheese was mixed with a Tablespoonful of paprika and smoked paprika, and a 'generous' sprinkle of chilli flakes.  These were then spread over the pastry, patted down and the pastry was rolled from one of the long sides... into a swiss roll shape.

Cutting the pastry roll into slices about 1.5cm thick, they were placed on a non-stick baking sheet and then put in a pre-heated hot oven (180C) for 10 minutes; they were checked and cooked for another 2 minutes until crisp and bubbling. 
Cooling them on the baking tray for a few minutes, they were removed and allowed to cool completely. 
A delicious, simple and spicy savoury treat.  Prepared and baked in 20 minutes - that's my type of cooking!