Showing posts with label sugar. Show all posts

Friday, 15 August 2014

Slow Cooker Peach Jam

In the supermarket the other day there was an offer on punnets of peaches... we bought 2 for £3 and decided to give slow cooker jam making a go using them.
Ingredients we used were -

2 punnets of peaches, peeled, stoned and chopped
Juice of half a lemon (about 30ml)
1kg jam sugar (this has pectin already in it and should allow setting)

First, we took the peaches in turn and scored a cross, carefully, on the 'opposite end to the stalk'... actually, this was Sous Chef J's chore.  He did very well and managed to complete the scoring of all 14 of the peaches despite his initial dislike of their hairiness!

Whilst Sous Chef J was hard at work battling his sensory demons and scoring the peaches, I filled a large saucepan with water and brought it to the boil.  We then dropped half the scored peaches into the water and allowed them to bubble for a minute or so before carefully removing them with a slotted spoon. 

Whilst the first batch were cooling, we added the remaining peaches to the pan and repeated the boiling, removing and cooling.  Then, we carefully peeled the (now smooth) skin from the peaches.

Next, I was assigned the task of stone removal and Sous Chef J was 'chopper-upper'.  The halved and stoned peaches were placed in a pyrex dish and Sous Chef J carefully chopped the fruit into smaller pieces.

Having prepared the peaches, Sous Chef J busied himself with getting the juice out of half a lemon.  This came to about 30ml juice and was added to and mixed through the peaches. We put a sideplate in the fridge at this point, to chill for use later...

The peach and juice mix was placed in the slow cooker pot and the sugar was added before being stirred through.  Putting the cooker on low, we placed on the lid and left it for an hour.  After an hour, we stirred the mix and left it for a further hour.

After two hours on low, the sugar had dissolved and, as there was a rather uneven 'peach bit' size noted... so we got out the trusty potato masher and gave the pot a bit of a light bashing.  Probably not in the Mary Berry book of how to make jam but appears to have worked for us!

The slow cooker was then put to the high setting and the jam was left to bubble away with the lid ajar, filling the house with a lovely aroma, for another hour.  Stirring thoroughly and returning the lid to its jaunty angle, we left it again - for an hour.

Now was the time for the 'wrinkle test' to see if it was ready to set... so we retrieved the chilled plate from the fridge, dropped a little of the jam on, left it for the count of 30 and tried to push a finger through it... not a hint of a wrinkle.  So, the mix was stirred, the timer set, and we left it for a further 30 minutes.  Sous Chef J 'tested' the non-wrinkling jam and declared it "delish".

We sterilised some jam jars and their lids by running them through the dishwasher and then putting them in the washing up bowl and filling with boiling water just before we were ready to bottle up the jam.

Finally, after 2 hours on high, the jam wrinkled (very slightly) so was declared ready for bottling... we drained the jam jars (making sure not to touch the insides) and used a non-stick wide funnel to share the jam between the jars.
 We bought the peaches for £3 and the jam was £1.99.  The Kilner jars we used for the jam we were giving away were 75p each (250ml).  The ingredients yielded three 250ml Kilner jars, two 340g jars and one 454g jar plus a small left over "cook's reward" amount of about 100ml.  Approximately 2kg of jam for £5 of ingredients which is £2.50 a kilo (excluding electricity) - whereas the peach jams I found online were
about £5.90 a kilo. 

This made a 'soft set' jam (a bit like the consistency of mango chutney) and it was taste tested on a slice of gluten free seeded toast.  YUMMY!

Monday, 28 January 2013

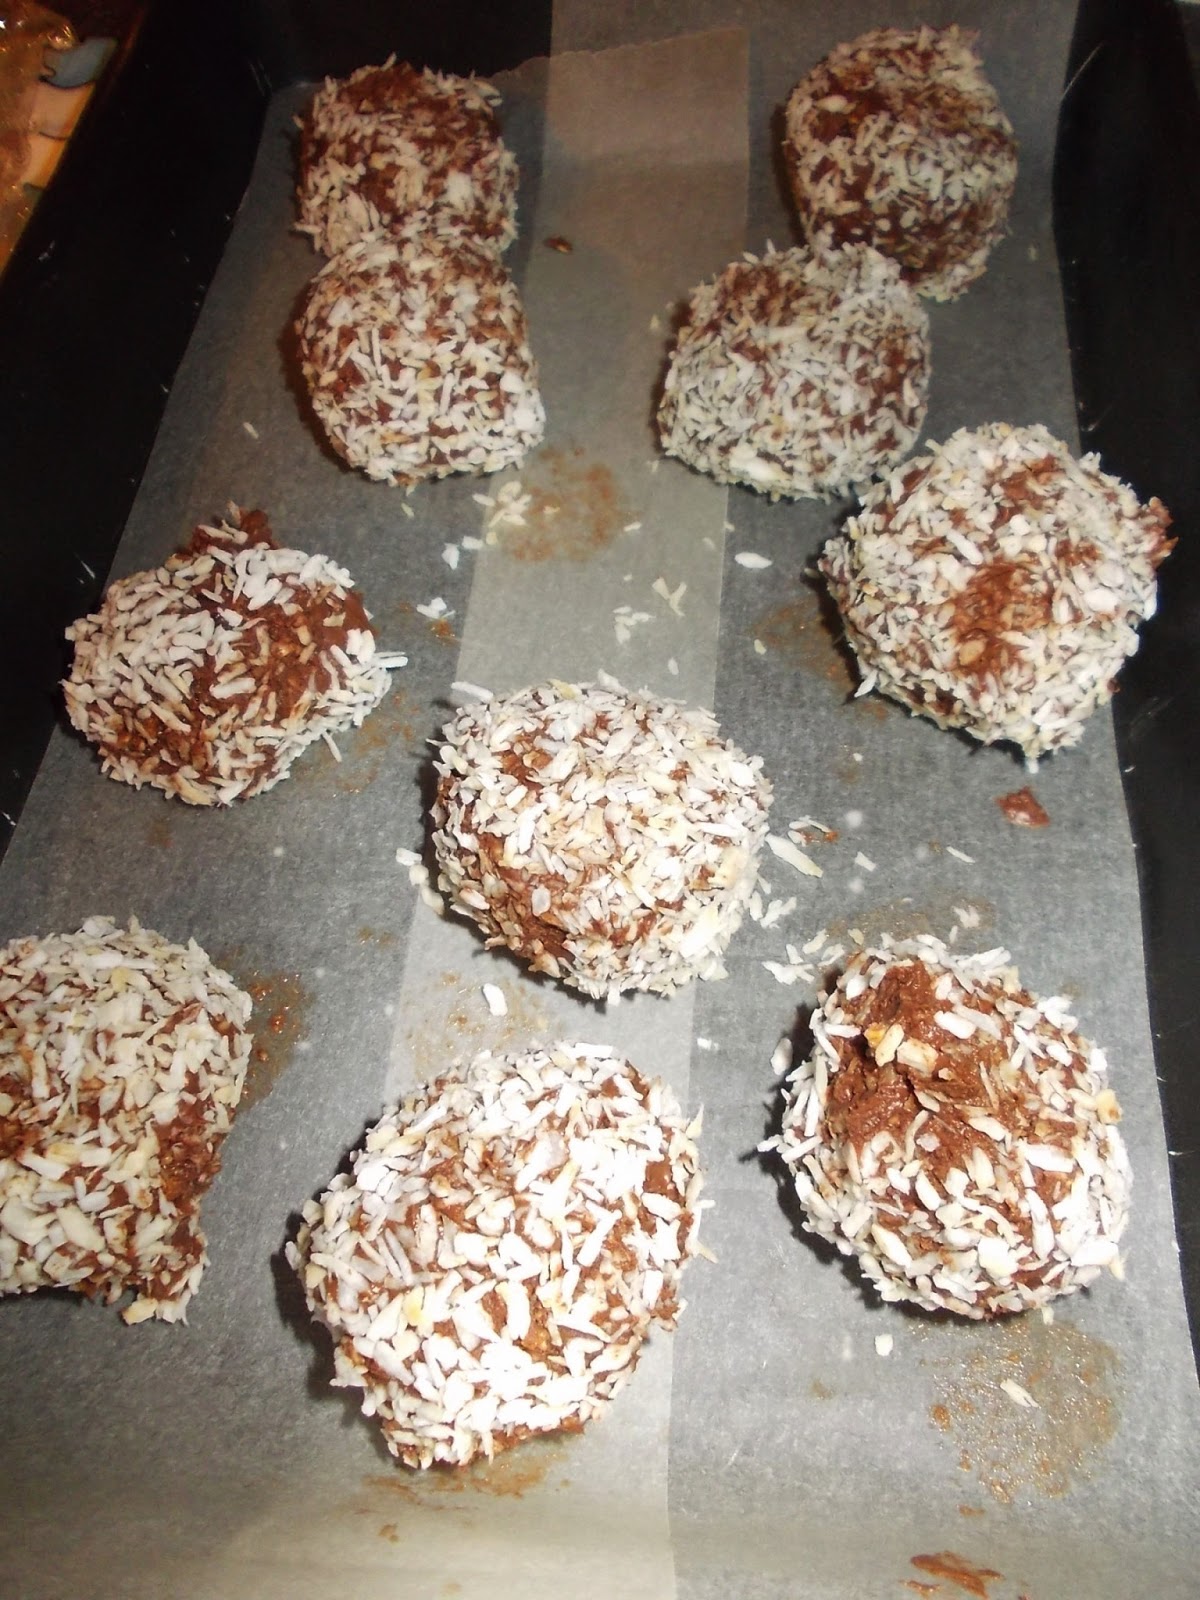
Chocolate Snowballs

Recent snowy weather in the UK got Sous Chef J thinking about foods with a snowy theme.  We came up with a plan to make a gooey interior, coat it in chocolate and roll in 'snow'.  They are a no cook treat and, be warned, you *may* get messy!

The ingredients we used for the 'inners' were-

100g gluten free oats
100g caster sugar
30g melted butter
1½ Tablespoons cold coffee
1 heaped dessert spoon cocoa powder

For the 'outers' we melted 75g milk chocolate and had 20g dessicated coconut ready for rolling in.

The oats were whizzed in a hand blender.  After adding the other dry ingredients the 'inners' to the whizzing pot, we whizzed the mix some more.  Then the melted butter and coffee were added and it was whizzed again until the mix came together in a damp dough.

Using a measuring spoon, the mix was divided into Tablespoon sized portions and rolled.  We got ten portions from the mix we made and they were placed on a lined baking tray.  Once all the mix was rolled, the tray was covered in cling film and placed in the fridge for an hour.


Having checked the 'inners' were chilled through and fairly solid, the milk chocolate was melted.  After coating the 'inners' in the chocolate, they were then rolled in the coconut.  The snowballs were then returned to the fridge to harden.

These are a sweet, bite sized treat and we were quite happy with how they turned out.

Wednesday, 25 July 2012

Raspberry Jam

After our  foray into "Pick Your Owning" at the weekend, we had far more berries than we could eat between us before they started to rot... so we searched for a recipe to make use of.  Having had a look around, we decided raspberry jam was the best bet for novice preserve makers like us.

The simplest recipes stated equal weights of fruit and sugar.  So, we weighed the remaining raspberries (452g) and matched them with sugar.

A large saucepan was used and we put the raspberries in and placed them over a low heat for a few minutes.  After they were warmed through, the sugar was added to the pan.  The berries and sugar were stirred and heated until all the sugar had been dissolved.

Once this happened, the heat was turned up and the mix was left to bubble vigourously for ten minutes (Sous Chef J commented "it looks a bit like a lava lake".)

Having chilled a plate in the bottom of the fridge during the lava lake phase, a small blob of jam was placed on the plate and pushed gently to see if it rippled.  It didn't.  So, the bubbling boiling continued for another 3 minutes when the blob pushing was repeated.  This time, there was a ripple!

The jam pan was removed from the heat and the scum was skimmed off (using a silicone spoon) and deposited on the push-test-plate.  The, now un-scummy, jam was then poured into a couple of jam jars which were fresh out of the top shelf of dishwasher (which had just finished its wash cycle).  Lids were placed on and the jam was left to cool.


Sous Chef J was impressed by the taste of our first batch of raspberry jam... which he taste tested, carefully, by licking the spoon.  He then prepared some labels for the jars and we left the jam to cool thoroughly.

Who knew making jam was so simple!