Showing posts with label cream. Show all posts

Friday, 24 April 2015

Crème Brûlée Kit

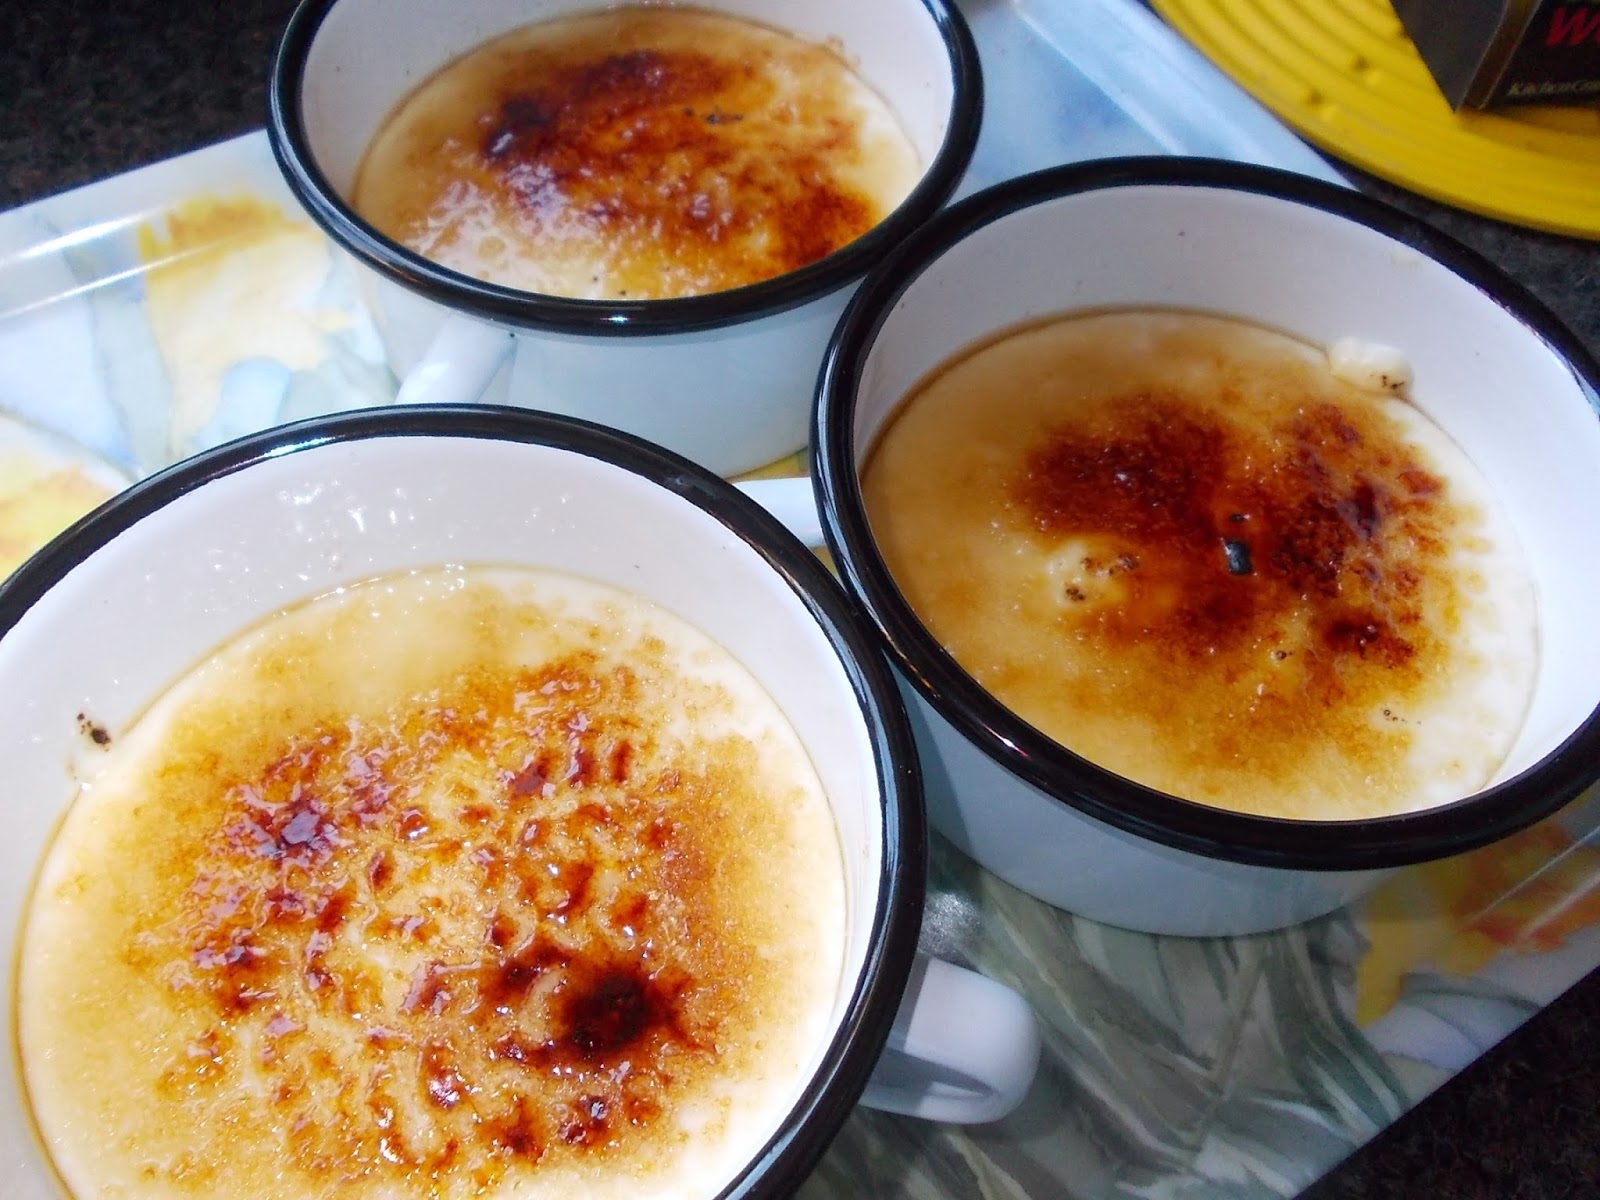
Sous Chef J adores crème brûlée... he also likes 'easy to make' dishes.  Being sent a packet of Sainsbury's make it yourself creme brulee was, therefore, something he was happy to have a go making.

Here's how he got on.

As usual, the first thing was to gather the ingredients so SCJ checked the packet to see what he'd need to use.


After measuring the ingredients and putting them with the kit, SCJ was ready to start with the simple 5 step instructions.


Having emptied the contents of the mix sachet into a pan, the cream and milk (250ml of each) was added.

After placing the pan on the hob, the cream/milk mix was brought to the boil whilst being stirred continuously.  As soon as it began to boil, SCJ set the timer for 2 minutes and reduced the heat to simmer the mix (again stirring all the time - we used a silicone whisk).

Once the mix had thickened, it was carefully shared between three dishes (and, yes, it was a little lumpy but we found that didn't matter later!)

The dishes were put in the fridge and chilled for a couple of hours before SCJ poured the contents of the sugar pack over the top (we'd decanted the sugar into a pot to make shaking/spreading easier).

When SCJ was happy with the sugar distribution, a blowtorch was used to caramlise (and not burn - too much!), or brûlée, the top.  If you don't have a blowtorch, then putting the dishes (make sure they're heat proof) under a hot grill for a couple of minutes will also work well.


Returning the dishes to the fridge until it was time to eat dessert meant the caramel became lovely and crisp.  SCJ enjoyed the dessert and was happy with the sharp crack/snap the caramelised sugar topping delivered.
Disclosure - SCJ was sent a packet of Crème Brûlée Dessert Kit by Sainsbury's to try but was not required to write a post or paid for this blog. 

Monday, 26 January 2015

Parma Ham, Cheese and Pea Tarts

Following a post-Christmas 'fridge audit' we discovered some Parma Ham that needed to be used up.  We also had double cream and yogurt that were nearing their use by dates.

The ingredients we needed to use were -
2 large eggs, beaten
50g Parmesan cheese, grated
One red onion, diced and lightly cooked
200ml live, natural yogurt
100ml double cream
6 slices Parma ham
Seasoning

Also - 100g frozen peas (could be replaced by asparagus spears or brocolli florets)

The onions were being lightly cooked in some sunflower oil until they became transparent.

Taking a muffin tin, each slice of ham was cut in half and used to line the tin.  This would form the 'case' for the tart/quiche filling.

Having mixed the yogurt, cream and beaten eggs, the Parmesan cheese was added and mixed through.


A dessertspoonful of the mix was added to the bottom of the 'case' and then some fried-off onions were laid on top.  Next, another layer of the mix was added until the 'cases' were filled.

Finally, a few frozen peas were added to each case.  The tarts were then ready to be cooked, at 170ºC (fan oven) for about 15 minutes.

We also cooked a 'large' pastryless tart/quiche by oiling a pyrex dish, and layering the mix, onions, mix in the same way.  This, larger, dish also had extra grated Parmesan sprinkled over the top before the frozen peas were added.  This was cooked for about 30 minutes, until it was lightly firm when the dish was moved.

The Parma Ham tarts were used, cold, for lunch on a day out before New Year's Eve with friends - they were much admired by our gluten-eating foodie pals.


We ate the large pastryless, vegetarian, quiche warm with chilli potatoes and a green salad.  It made a lovely change from the 'excesses' of the Festive Season.

Friday, 18 July 2014

Ice Cream Cake


We decided, with it being a hot weekend forecast, that we'd make an ice cream cake... having flirted, (momentarily) with thoughts of making a gluten free 'arctic roll' type ice-cream-filled-roulade, common sense (and laziness) returned.  A silicone cake mould had been bought a few weeks before and we had some Swedish Glace vanilla in the freezer... that, with some added extras, would be our simple cake! 

The 'main' ingredients used were a whole pot of vanilla Swedish glace and mixed nuts.  We used pecans, pistachios and macadamias in the cake.  Flaked almonds were used on the top together with a few of the pistachios.

If we'd had them, we would have put in some gluten free mini macaroons/amaretti biscuits or honeycomb to add a bit of crunch to the mix.

Using a whole pot of Swedish Glace, we put it in a bowl and softened it up by stirring.


 Taking our assortment of nuts, they were lightly toasted in a hot frying pan (don't leave them for long, they catch and burn quickly) then allowed to cool.


The cooled, toasted nuts were then roughly chopped...


... before being added to the softened vanilla ice cream.  Sous Chef J had a bit of a struggle to get the mixture combined but managed it in the end.


Next, the nut and ice cream mix was added to the silicone mould, which was then put in a large plastic bag and put in the freezer overnight (or you could leave it
longer) to re-freeze.


Once it was nearly time to serve the ice cream cake, we had to 'ice' it... to do this we made a ganache using equal volumes of dark chocolate and double cream.   The cream was heated to just below boiling point, allowed to cool slightly and then the chocolate was added and stirred well until it was smooth and glossy.

Whilst we were letting the ganache cool, we turned out the cake from the silicone mould. This was surprisingly easy.


The 'cake' looked pretty impressive and was ready to be 'iced'.

Taking the cooled chocolate ganache, it was gently spread over the ice cream cake and allowed to 'find its level' - aka leak all over!

When the chocolate ganache had been added, we sprinkled over the remaining pistachios and flaked almonds together with some chocolate stars I'd found in the cupboard.
The cake was then returned to the freezer, briefly.  Finally, we sprinkled over some dried raspberries to go with the fresh raspberries we added to the final dish for serving.

Friday, 10 January 2014

Slow Cooker Potato Layers

To make this simple store cupboard dish, we gathered the ingredients - garlic (2 cloves), onion (one large), potatoes (we used about 6 small ones), butter, cheese (grated leftovers from Christmas) and vegetable stock.  The amounts you will need depend on how big a potful you want to make - you'll need enough potatoes, onions and garlic for the layers and can add as much (or little/no) cheese as suits.  We used cheddar cheese, finely grated but gruyere or others could be used if they're what you've got to hand.  Here's what we did -

Whilst the onions were sliced thinly and the garlic was chopped, we switched the slow cooker on high to warm it up. 
Next, we sliced the potatoes thinly (and carefully) using a mini-mandolin device we have... it's always a bit of a worry to use such things as digits get very close to blade - hence I did this rather than delegate to Sous Chef J.
Once everything was prepared, we greased the inside of the slow cooker pot with butter, then began assembly...
 .... which is simply layering onion and garlic, then potato slices and cheese... repeat until all ingredients used up.
On the top layer, we added some knobs of butter and a good grind of black pepper.
Finally, vegetable stock (we made ours up using a Knorr stock pot and used about 300ml, enough to just about reach the top of the layers) was poured into the pot and the slow cooker was turned down to low. 

The lid was placed on and the dish was left to cook for about 6 hours.  (It can also be cooked on high for about 3 hours -  which is useful if you forget to start the dish in time to leave it to cook for hours and need to eat earlier!)

The end result was judged as being "very tasty".

Thursday, 11 April 2013

Slow Cooker Rice Pudding

Those of you who follow this blog will be aware that we're trying to get Sous Chef J to stop losing weight... with this in mind we've been trying to think of calorific foods that he will eat.  As he has an aversion to certain textures and will only eat when hungry, it's not as easy as it sounds!

So, we thought of rice pudding.  In the slow cooker.  With cream.  Sous Chef J liked the idea and suggested adding dried fruit "so it's healthy"... and this is how we made it.

As is typical for our recipes, we used few ingredients.  This time we needed 100g pudding rice, 1 litre milk, 1 pot (227ml) double cream and a handful of dried fruit.

Having decided to use the slow cooker, we added the ingredients to the pot, gave them a stir and put it on a high heat for the first hour.  After this, we gave another good stir and turned the cooker down to low.

Six hours later, we had a lovely slow cooker bowl full of rice pudding.

Happily, Sous Chef J was more than willing to eat his bowlful of calories and that's what this dish was all about!

(... and it's VERY simple to make too)


Tuesday, 11 September 2012

Lemon and Lime CheatsCake

On a search through the cupboard (looking for an elusive tin of chickpeas) we spotted a can of condensed milk and wondered what we could make to use it up.  As Sous Chef J is a fan of all things citrus we decided to try to make something similar to a key lime pie.

However, after 'auditing' supplies, we realised there weren't enough limes to make a lime pie... but we had lemons too and, so, lemon and lime was the citrus blend we decided to go with.  On the day we made this, it was quite warm (strangely, for a UK summer!) and we didn't want to have to use the oven to cook it (which some internet recipes require.)  This made us think of alternatives and we decided on a no-cook biscuit base.
With our pudding in mind, we gathered all the ingredients together.  There was a pot of double cream,  200g of gluten free digestives (we used Tesco free from) and 100g of butter to add to the condensed milk and lemons and limes.


The biscuits were crushed (you could whiz them in a food processor) and, whilst this was happening, the butter was melted.  Next the melted butter was added to the biscuit crumb and mixed well.  This was then spread out evenly over the base of a well greased, 20cm spring form tin and placed in the fridge to chill.

The double cream and condensed milk were then whisked together.  After squeezing and zesting the lemons and limes, the juice and zest was added to the cream/milk and mixed well.  This was then spooned over the chilled biscuit base and returned to the fridge to set.

Just prior to serving, the top of the cake was decorated with slices of lemon and lime and the springform tin was (carefully) removed.


Then it was time for the 'will it stay together' and taste test.  Luckily, it DID stay together and it tasted "yummy" too.


Our Lemon and Lime CheatsCake... named because it's not really a cheesecake but has similarities.  Whatever it is, it's tasty and doesn't last long!