Friday 24 April 2015

Crème Brûlée Kit

Sous Chef J adores crème brûlée... he also likes 'easy to make' dishes.  Being sent a packet of Sainsbury's make it yourself creme brulee was, therefore, something he was happy to have a go making.

Here's how he got on.

As usual, the first thing was to gather the ingredients so SCJ checked the packet to see what he'd need to use.


After measuring the ingredients and putting them with the kit, SCJ was ready to start with the simple 5 step instructions.


Having emptied the contents of the mix sachet into a pan, the cream and milk (250ml of each) was added.

After placing the pan on the hob, the cream/milk mix was brought to the boil whilst being stirred continuously.  As soon as it began to boil, SCJ set the timer for 2 minutes and reduced the heat to simmer the mix (again stirring all the time - we used a silicone whisk).

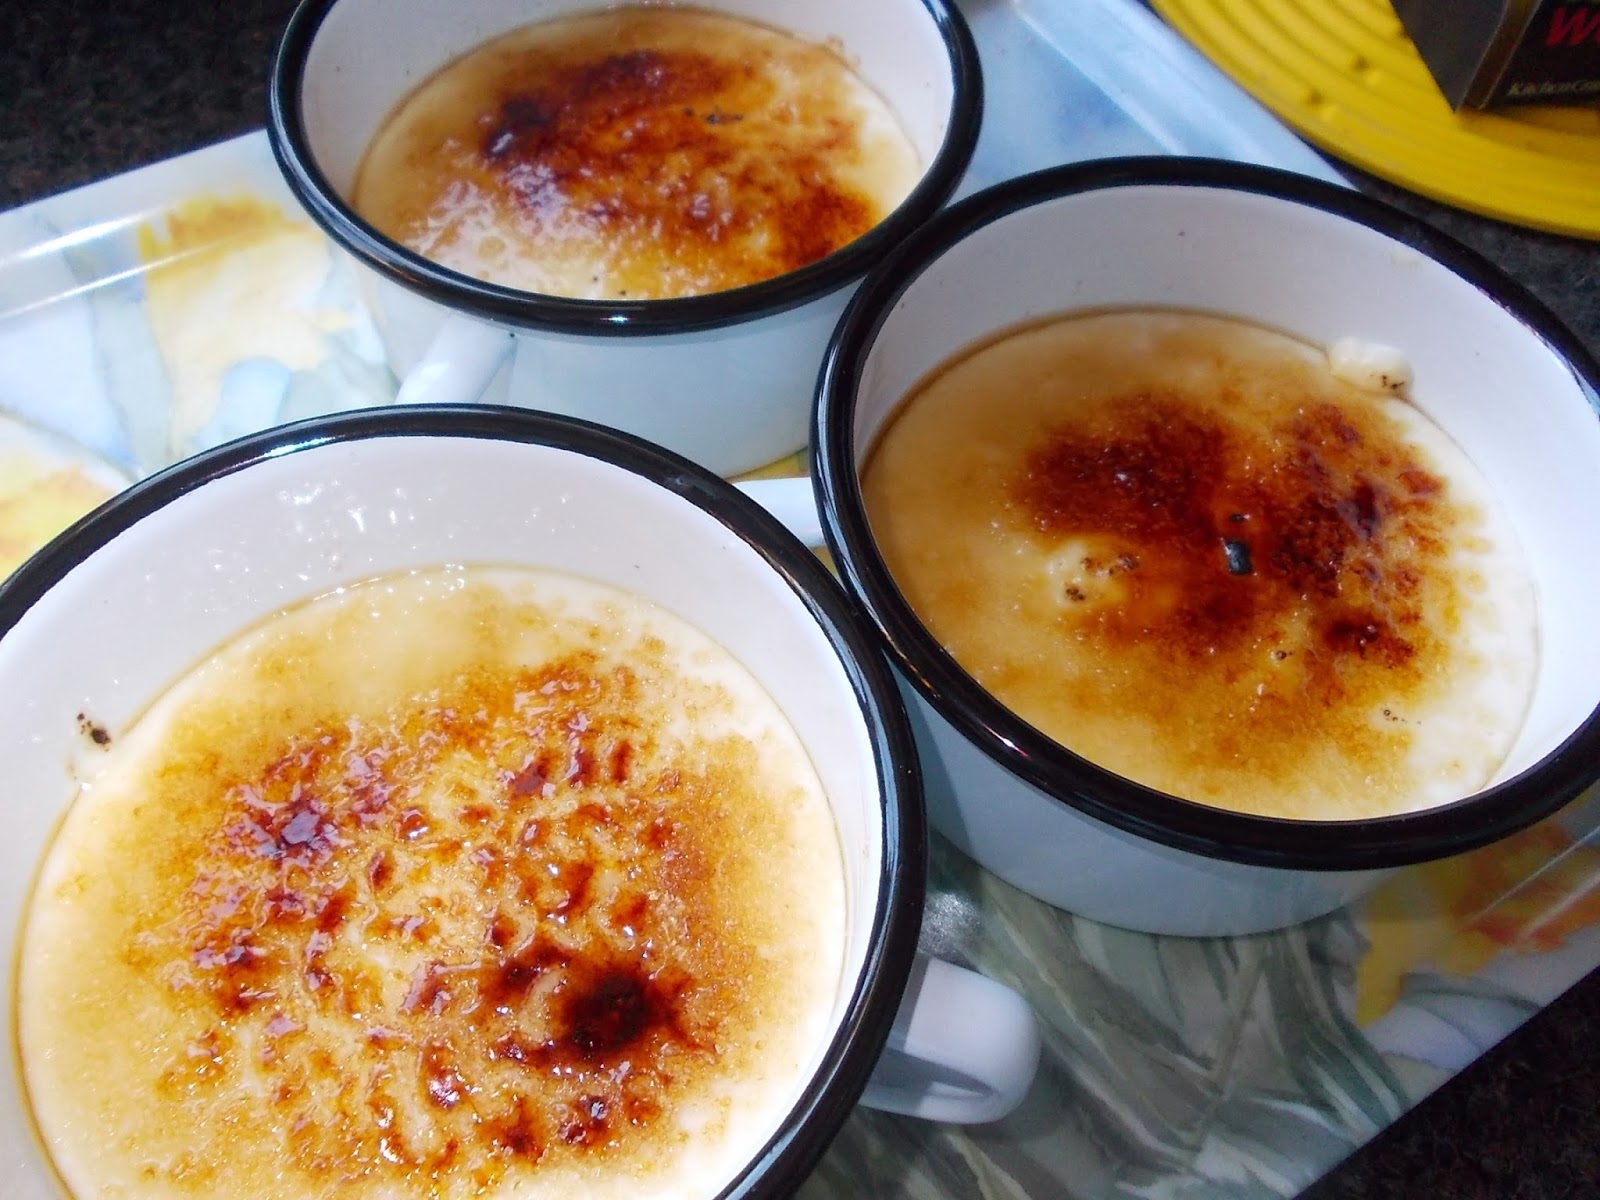
Once the mix had thickened, it was carefully shared between three dishes (and, yes, it was a little lumpy but we found that didn't matter later!)

The dishes were put in the fridge and chilled for a couple of hours before SCJ poured the contents of the sugar pack over the top (we'd decanted the sugar into a pot to make shaking/spreading easier).

When SCJ was happy with the sugar distribution, a blowtorch was used to caramlise (and not burn - too much!), or brûlée, the top.  If you don't have a blowtorch, then putting the dishes (make sure they're heat proof) under a hot grill for a couple of minutes will also work well.


Returning the dishes to the fridge until it was time to eat dessert meant the caramel became lovely and crisp.  SCJ enjoyed the dessert and was happy with the sharp crack/snap the caramelised sugar topping delivered.
Disclosure - SCJ was sent a packet of Crème Brûlée Dessert Kit by Sainsbury's to try but was not required to write a post or paid for this blog. 

Wednesday 15 April 2015

Rhubarb and Custard Traybake

Flicking through the Waitrose Spring Harvest 2015 booklet, Sous Chef J spotted a few recipes he "liked the look of" and, having read the ingredients, we decided we could make the bakes, with a few 'tweaks', gluten free.  This Rhubarb and Custard Traybake recipe tweak required us to use Dove's Farm Gluten Free self raising flour instead of the gluten containing 'stuff'.

400g rhubarb, trimmed and cut into 2cm lengths
225g caster sugar
250g slightly salted butter, softened, plus extra for greasing
3 medium eggs
175g self-raising flour (we used Dove's Farm gluten free)
50g custard powder (we used Bird's)
100g ground almonds
500g tub Waitrose Seriously Creamy Madagascan Vanilla Custard
12 sugar cubes, crushed (we used Pearlsugar)


Preheating the oven to 220C, we prepared the rhubarb by placing it on a non-stick baking sheet, sprinkling with 25g of the caster sugar and baking for about 15 minutes until it began to soften. 

Reducing the oven temperature to 170C (fan) we then began making the base of the traybake.


The remaining 200g of the caster sugar, softened butter, eggs, flour, custard powder, ground almonds and 100g of the custard were mixed together (we used an electric hand mixer).  This produced quite a firm mix and we brought it together, scraping around the bowl, using a silicone spatula.

Having prepared a shallow, non-stick 23cmx33cm baking tray by greasing it (we used the wrapper from the butter) and lining with baking parchment, we were ready to add the 'base' of the traybake.


Spreading the base mix out as evenly as possible, a dessertspoon was used to press into the mix and make 'wells'...


... which were then filled with the remaining ready-made custard.

Spreading the cooked (and cooled) rhubarb over the base, the traybake was ready to be baked.

We checked the traybake after 30 minutes at 170C and left it in the oven for a further 15 minutes - until the sponge was firm and the custard still had a bit of a wobble.

Taking the traybake out of the oven, it was placed on a wire rack and left to cool in its tin.... we sprinkled over a tablespoonful of pearlsugar (Scandinavian sugar).

The cooling traybake looked impressively like the one in the recipe we were following.

Once the traybake was fully cooled, we cut it into 15 pieces and were pleased that it stayed together nicely.  The sponge base was lovely and soft but kept its shape.  Finding the pockets of custard, now firm and unctuous, with the tart rhubarb topping gave each portion a lovely range of tastes and textures.


NOTE - we made this bake again this weekend but used two smaller trays... it was a huge success.

Thursday 9 April 2015

Black Garlic and Chilli Butter


We like to get Sous Chef J to try new foods, so when we were sent a bulb of Black Garlic by Sainsbury's we started to think about how to use it in a way he'd like to eat it.  Hitting on the idea of a spicy butter to go with a beef steak, we took a closer look at the garlic.

The Black Garlic bulb is a light rust colour and its outer skin texture resembles tissue paper.  We carefully peeled away part of the outer layer of cloves.  Having taken the cloves off the bulb, some were then peeled (we found starting at the root end resulted in the 'cleanest' way to do this) and that's when the blackness of the garlic was revealed.

The cloves are soft and squidgy feeling...we were careful not to squash them but I did try one.  It reminded me of the cloves of garlic we'd all wait for when my late father used to make a slow cooked one-pot dish called "Chicken with 40 cloves of garlic".  As the name suggests, a chicken was cooked in a lidded casserole with 40 cloves of garlic (unpeeled) and the resulting melt-in-the-mouth middle of the cloves that were squeezed out to be eaten with the chicken were amazing.  The slow cooking had mellowed the garlicky taste and this Black Garlic clove has a similar, less aggressive, taste.


Gathering the very few items needed to make our Black Garlic and Chilli Butter...

4 cloves Black Garlic (peeled)
1/4 teaspoon chilli flakes
50g unsalted butter (softened)

... they were put in a bowl where they were mashed together (our butter had part-melted in the warm Easter sunshine so it looks a bit messy).  The butter was then seasoned with sea salt and freshly ground black pepper.

By this point the butter was looking quite liquid and needed chilling.  With this in mind we wrapped the butter in clingfilm and made a sausage shape. It was then put it in the freezer to chill.  If we'd had more time, we'd have put it in the fridge to use later.

Having fried our steaks, a ring of butter was cut from the roll, placed on the steak and allowed to melt into a delicious garlicky, buttery, spicy mix.  YUM!   Great to use for speedy BBQ seasoning too.

Sunday 5 April 2015

Trio of Treats at Packwood House


As blog readers will know, we're always on the look out for opportunities to try gluten free goodies when out and about.  This Easter weekend we decided to head to the National Trust's Packwood House for a mid-morning coffee (and cake) stop.

Although it was quiet when we arrived, we executed a speed visit (which is the norm with Sous Chef J) and left before the House opened (more on that later).  However, we still had time to have a wander in the walled kitchen garden - which is a lovely, calm space complete with Mole Deterrent and resident cat - before heading into the cafe.

Once indoors we decided to select one of each of the three, yes THREE, gluten free cake options on sale.  The hot drinks - one cappucino, one latte and a hot chocolate - were all very well prepared as there was nothing of 'surface of the sun' temperature to contend with (a bugbear of ours).

The cakes were delicious and each of us decided OUR cake choice was the best!! J's chocolate brownie was squishy in the middle, my toffee fudge cake was a decadent treat and B's almond cake was moist and moreish.
We have been to Packwood House a number of times now so have been round the house on previous visits... J particularly likes all the "dark and myserious stuff" in the house (there's a BIG key he loves to see) and the Great Hall is a lovely space  The parkland is a good choice for a wander with Peppie dog (we left him at home today as the weather didn't seem conducive to sitting outside for our cafe stop) and the yew tree topiary is a sight to behold in the formal garden area.

Definitely a destination we like to visit time and again to see the house and grounds in different seasons... and, of course, check out the cakes on offer in the cafe!

Pineapple Ketchup & Sweet Potato Wedges

We spotted a recipe for Pineapple Ketchup (to go with sweet potato wedges) in the Waitrose Spring 2015 leaflet (the same one this Lemon & Pistachio Cake was in) and thought it would be a nice idea to give it a try.  Of course, we decided not to make the amount the recipe is for but, as it was a trial, we'd make half.

For the amount of ketchup we wanted to make, we needed -

1 tbsp olive oil
2 shallots, finely sliced (we used frozen, chopped shallots - about 4 Tablespoons)
3cm piece fresh root ginger, peeled and grated
1/4 tsp ground cloves
1/4 tsp ground cinnamon
3 all spice berries
2 cloves garlic, peeled and halved
1 small pineapple, peeled, core removed, flesh chopped
100ml cider vinegar
100ml pineapple juice
Lime juice (we used 45ml ready squeezed juice)
100g brown sugar
1 tbsp sundried tomato paste

Putting the olive oil in a saucepan, we heated it through and added the chopped, frozen shallots.  These were then cooked on a low heat for a couple of minutes (to de-frost them) then the heat was increased and they were cooked until they started to soften (about 5 minutes).

Adding the ginger, spices and garlic to the shallots, they were cooked for another 5 minutes.

Stirring in the pineapple, vinegar, juices, sugar and tomato paste, the heat was increased until the ingredients started to simmer.  We then reduced the heat and cooked for another 25-30 minutes when there was less moisture and the pineapple was starting to break down.

We turned off the heat and waited for about half an hour for the mix to cool when we used a stick blender to purée the ketchup.  Up to this point we felt it was pretty much like making a chutney.

The next step was to pour the ketchup into a sieve (placed over a bowl), using a spoon to push it through.

Finally the ketchup was 'bottled' in sterilised jam jars.  Not a huge amount but enough for a first try.

The Waitrose recipe says the ketchup can be kept for 3 months but, having tasted it, we don't think ours will last this long!

On another day, we got round to making the sweet potato wedges.  It was simple and the pictures below show this... 
Gather sweet potatoes and scrub them


Cut into wedges, toss in 2 tablespoons of olive oil, mix through 1 teaspoon of sweet smoked paprika (we used a little more than this)

Spread in a single layer onto a baking sheet (ours was preheated) and bake at 200C for 25-30 mins (depends on wedge size). 


Remove from oven


Sprinkle with chopped, fresh rosemary


The cooked wedges were then served with the previously made pineapple ketchup.  The dish was declared "lovely" by Sous Chef J.  The next batch of wedges and ketchup we make will both be larger!

Saturday 4 April 2015

Hot Cross Buns

 
Getting into the Easter spirit, we decided to see if we could make gluten free Hot Cross Buns and after searching the internet, found this recipe on the BBC Good Food website - it's by Paul Hollywood so we had high hopes it'd work.

As is usual, we began by gathering the ingredients for the buns; items 1 to 8 are needed for the 'dough' making stage -
  1. 300ml full-fat milk, plus 2 tbsp more
  2. 50g butter
  3. 500g gluten and wheat-free white bread flour (we used Dove's Farm gluten & wheat free white bread flour)
  4. 1 tsp salt
  5. 75g caster sugar
  6. 2 tsp quick yeast (we used Dove's Farm)
  7. 1 large egg, beaten
  8. 1 tbsp sunflower oil (needed for oiling the bowl and cling film) Ingredients needed for addition to the dough once it's proved
  9. 1 tsp olive oil
  10. 75g sultanas
  11. 50g mixed peel
  12. zest 1 orange
  13. 1 apple, peeled, cored and finely chopped
  14. 1 tsp ground cinnamon
Starting with making the dough, the milk was heated to boiling (watch carefully or you'll have a mess to clear up) then removed from heat and butter added.


Once the milk/butter mix was hand hot, it was added to the remainder of the dough ingredients.  The electric hand mixer was then used, with its dough hooks, to mix till it started to bind.


Turning the dough out onto a silicone sheet, it was quickly brought together by hand before being put in an oiled bowl, covered with oiled clingfilm and placed in the airing cupboard to prove.

We checked the dough after an hour and decided to leave it for another half hour... when our fingers left an indentation.

At this point, the other ingredients (items 9 to 14 above) were added to the dough and we attempted to spread them through evenly. (NOTE - next time we make these, we will mix ingredients 9-14 together in a bowl before adding to the dough as think that may result in a more even result)

Measuring the dough into 100g pieces, we rolled them (on the silicone sheet) and placed them on a non-stick baking sheet.  They were then covered with cling film and left to rise for just over an hour.

Next we added the crosses... although only to 2/3rds of our buns as Sous Chef J declared he "hates the crosses" and wouldn't eat them if they had one.  Making up the cross paste, we used 20g Dove's Farm Plain Flour and carefully added small amounts of water until the paste was mobile but not runny.  Having made a piping bag out of a piece of circular cake liner, the paste was put in, the base snipped off and the crosses were added.


The Hot Cross Buns were placed in a pre-heated (fan) oven (200C) and baked for 20 minutes.
Warming three tablespoons of apricot jam in a small pan, we then brushed it onto the now-cooling-down Hot Cross Buns.


We should have followed the master baker's instruction to sieve the warmed jam but we didn't.  As a result the finished buns have a rustic (lumpy glaze) look.

Toasting the buns for breakfast they looked like this.... and, we have to admit, were a little dense which we think was because they weren't proved enough.  However, they do taste good and were nice and spicy. 

It was a fun bake and something we will try again.